Monday, 23 March 2020

Week 5- Models & Inspiration


Week 5- continuation of models from 2D to 3D


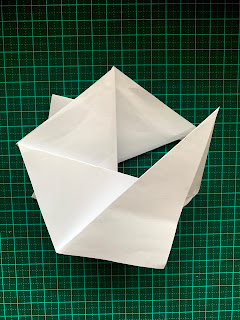
 experimentation with video folding techniques including simple spirals, dividing the paper, no crease etc.


 I found that paper is a very accessible and inexpensive material to use when you want something easy to manipulate cut and fold. Although I do not recommended it as a sturdy material or base, as when overlapping tracing paper to allude to a sliding glass panel the paper would wobble and needed several amounts of tape to hold. It is a good material to enhance lighting and elegant shadows.


On the other hand cardboard was quite hard to find so I decided to use a cereal box as the main source of material. I found that it was much harder to cut even with an X- ACTO knife it requires more pressure and repetitive slices. A challenge for me was precisely finishing the corners and cutting all the way to the end as the ruler created a barrier for me to see I would just pull the cardboard piece out, resulting in a unfinished look and excess cardboard hanging out. Ways forward I will be more careful when removing excess and face the ruler the opposite direction when cutting to ensure a clear visual of point A and point B.

Inspiration 

Note: Not my images  
  • contrast- colour, line, shape, direction, emphasis, lighting
  • triangles- angular form
  • wood complements black 
  • negative space 
  • 2D and 3D built form 
  • texture 

\

Week 5- Notes on model making and Sketch modelling


Week 5- Sketch Modelling: 2D materials to 3D form for models

By referring to a range of different folding techniques not known to me before  I was able to understand different ways you can manipulate and crease a paper. Forming unique shapes and lines coming from different directions. The term "mountain" is used to describe the paper lifting from the ground/ table once folded. 

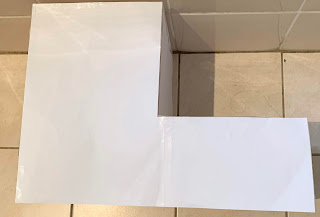
For this model making activity I wanted to simply make the base outline of my room but also depict its functions such as a door and a sliding panel which leads to the balcony. By doing so my models will become more intricate and a better representation of the real world. I decided to make a 1:10 scale as noted in the exercise for paper, however a 1:20 scale for cardboard as I was quite limited on materials and only had one cereal box in my household to deconstruct.

Sunday, 15 March 2020

Week 4- Overview of Tracing the City Works (x4)

Week 4 Final Outcome 

Grid location using Photoshop


Data Visualisation

Pedestrian movement through allocated grid location

Collate analogue and digital works 

Overall I found the assessment quite challenging and enjoyable as working in a team of different disciplines we each had different ideas and aesthetics, however by effectively communicating and teamwork we used our strengths to our advantage in order to produce the best possible outcome. 

Week 4- Curation of digital and analogue drawings/photographs


Week 4
For this piece I decided to redo the site analysis of our chosen grid to enhance a much more vibrant, open space of greenery so students can feel a stronger sense of freshness and connection with nature.

Through the site I was inspired to produce these abstract paintings, where I was able to gather a deeper understanding of what shapes and lines to use. 

Tuesday, 10 March 2020

Week 3- Site Orthographic Map


Site Orthographic Map


The above map is 40x40m with a scale of 1:2 and illustrates the outline of the site, including its buildings, stairs, retaining walls, poles, pathways etc. Essentially the chosen colour palette should represent the morning time of 10am (e.g yellow to symbolise the sun).


By overlaying transparent drawing paper on top of the original map I was able to incorporate trees and greenery onto the site, therefore I have a clearer understanding of colour and proportion.

Friday, 6 March 2020

Week 3- Plan, Section, Elevation, Scale, Orthographic Views


Sketching: Plans Sections, Elevations and Scale.
By transferring the Makerspace box onto paper and into a two dimensional form I was able to map out its top, front and side view. This made it easy to visualise as the measurements were to a 1:2 scale and darker lines represented thicker lines/ wood on the box. 

The top right corner showcases the results from a second activity where a three dimensional object mapped on paper had to be deconstructed to illustrate a two dimensional orthographic projection. Overall while studying city planning a small scale was hard to visualise and draw out. 

Week 2- Images of transportation for infographics


Collage of transport to UNSW 


From these images I was able to use Adobe Capture and generate the following swatches and colour theory for my infographic chart.

Week 1- Site Documentation and photoshop activity


Site Documentation, sketching and photography

By observing the given site as a group within UNSW we noted the time of day, sunlight, wind, pedestrian movement, stairs, greenery, seating space, foot paths, water and statues to make detailed observations and produce a visual map.

Photoshop activity
Adding Trump to the site by applying the skills learnt in Russell's tutorial on Moodle

Week 1- Drawing of chair activity


In-class drawing activity: types of mark-making.


By visually only looking at the object of a chair and free hand drawing its outline I was able to create unique shapes and lines, learn about negative/positive space and experiment with different thickness of lines.

Week 1- Introduction of different materials and techniques


Sketches 


By using a range of pens and pencils I was able to create different effects and techniques including cross hatching and stippling