Sunday, 5 April 2020

Week 7- Refined concept drawings/ Sketches of room


Refined Concept drawings and Sketches of room

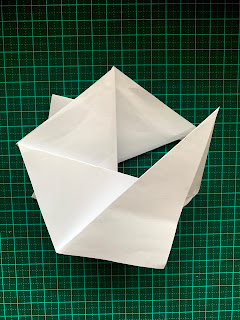
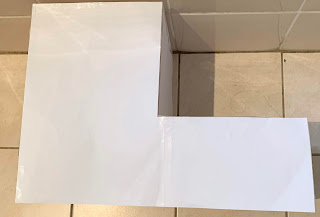
Design 1 enhances a strong use of levels and geometric shape. With the folding technique of X form spans and simply dividing the paper

Design 2 incorporates a new form of folding, instead by unconventionally overlapping string to form a semi circle, this design aims to challenge traditional paper techniques. Crumpling technique is used to form the basis

Design three is a less abstract approach to my room including a balcony, roof and basement internally. Building upon week 5 this model will incorporate masu box, simple spirals and no crease techniques

Week 7- Part 2 Fusion 360


Fusion 360 Application of room 

Note:  Due to the unfortunate circumstances of being unable to use a laser printer I have reverted to the my main source of material being cardboard. The fusion 360 drawing was printed on A2 cardboard and will be assembled as if it was wood and laser cut, however the thickness of 3mm will not apply but the measurements and a 1:20 scale are as follows.

My first attempt was very much a fail and frustrating, having never used Fusion 360 the hot keys were hard to get use to, measurements weren't precise, extruding the wrong way and unmatched pieces intersecting.

The third attempt was much more easier and I managed to complete the layout of my room successfully. The ends interlocked and slipped in perfectly making the final outcome extremely smooth and clean.
Outcome when aligning and moving components 

Moving detached components onto a A2 drawing pad (1:1) to be able to print and assemble in 3D form, illustrator step is skipped as I wont have access to uni/ a laser printer 


The results of the final fusion 360 model was quite easy to assemble by sticking the A2 design printout on cardboard as the tabs easily slipped in and held together, however cutting the pieces was very time consuming (scale 1:20)

Fusion 360 with folding tabs 

Instead of interlocking seperate components and forming a three dimensional plane as shown with the cardboard cut out I have alternatively inserted tabs and attached components together, so each corner can be folder together smoothly.  

The final design was then transferred into a drawing on A2 size paper and printed out.

This was the result once cut out by an x-acto knife, ready to be folded and assembled.

Finally to construct the model for completion I folded the paper where the line was for each component and glued the tabs to each side. In summary the hidden folded tabs make the model very clean cut externally and precise, opposed to the interlocking method as you can see certain areas poking out.

Week 7- Light and Scale


Light and Scale

Natural Light
When photographing my room with a natural light source of sun coming from my balcony window at 8am, the shadows are very soft and blend into the back drop/ background subtly.
Similar results but with a 1:20 scale figure standing outside on the balcony porch, the shadows are gently casted in the upper basement, outlining the curves of the roof and lines within the stairs. 
The natural lighting entering from the door and top allows the inside of the room and geometric flooring to come to life. 


 Flash Light

By using a lamp/ flashlight from another phone immediately there is a strong difference, it gives a very cosy and how vibe as well as contrast is much more evident and the light is sharper opposed to natural lighting. 


The advantages of using a flash light allows me to vary how dark/ light I want the shadows to display e.g the left image has the flashlight far away from the model (roughly 1m), while the right one has the light source very close (roughly where the image was cropped)


 Further examples of how a flash light can enhance movement, pathways, shapes, line and shadows within the space. What once use to be a black/ grey sliding door is now a warm yellow through the power of light.

Monday, 23 March 2020

Week 5- Models & Inspiration


Week 5- continuation of models from 2D to 3D


 experimentation with video folding techniques including simple spirals, dividing the paper, no crease etc.


 I found that paper is a very accessible and inexpensive material to use when you want something easy to manipulate cut and fold. Although I do not recommended it as a sturdy material or base, as when overlapping tracing paper to allude to a sliding glass panel the paper would wobble and needed several amounts of tape to hold. It is a good material to enhance lighting and elegant shadows.


On the other hand cardboard was quite hard to find so I decided to use a cereal box as the main source of material. I found that it was much harder to cut even with an X- ACTO knife it requires more pressure and repetitive slices. A challenge for me was precisely finishing the corners and cutting all the way to the end as the ruler created a barrier for me to see I would just pull the cardboard piece out, resulting in a unfinished look and excess cardboard hanging out. Ways forward I will be more careful when removing excess and face the ruler the opposite direction when cutting to ensure a clear visual of point A and point B.

Inspiration 

Note: Not my images  
  • contrast- colour, line, shape, direction, emphasis, lighting
  • triangles- angular form
  • wood complements black 
  • negative space 
  • 2D and 3D built form 
  • texture 

\